Macro photography lets you explore and magnify the tiny wonders around you, making them appear larger than life. To start, you'll need a macro lens for true 1:1 magnification and a sturdy tripod to stabilize your shots. Proper lighting is critical—consider a macro ring light to evenly illuminate your subject. Set your camera with a low ISO to reduce noise and a slow shutter speed, supported by your tripod, to capture sharp, detailed images. Mastering the art of shooting up close enhances your skills and transforms ordinary objects into extraordinary photographs. Keep exploring these techniques, and you'll see details and beauty previously unnoticed.
Understanding Macro Photography
Macro photography opens up a world where the minute details of our surroundings are transformed into striking, expansive subjects. By understanding the macro definition, you're delving into the art of making small objects appear larger than life in your photos, typically capturing subjects so close that they're as big as, or even bigger than, their life-size equivalents in your images.
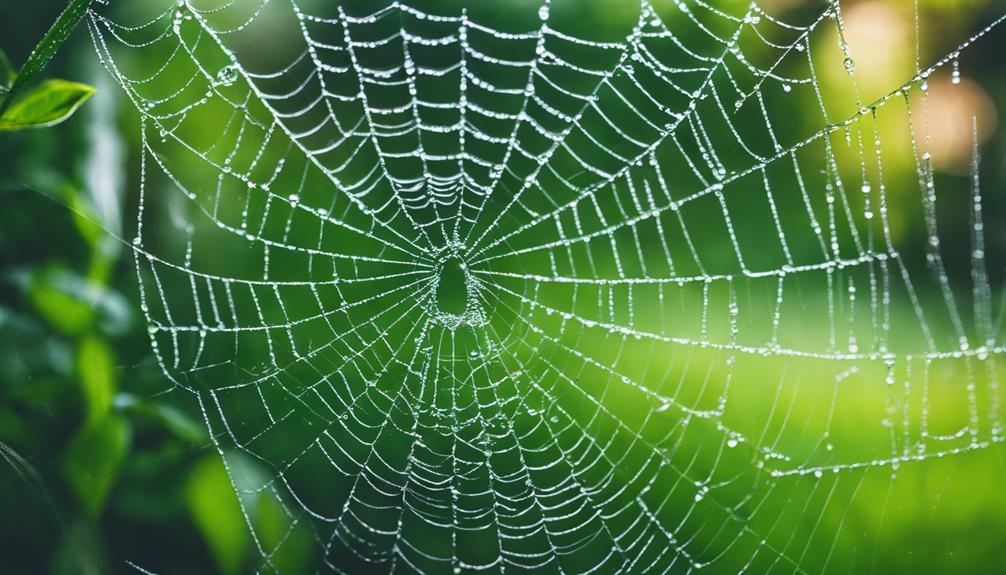
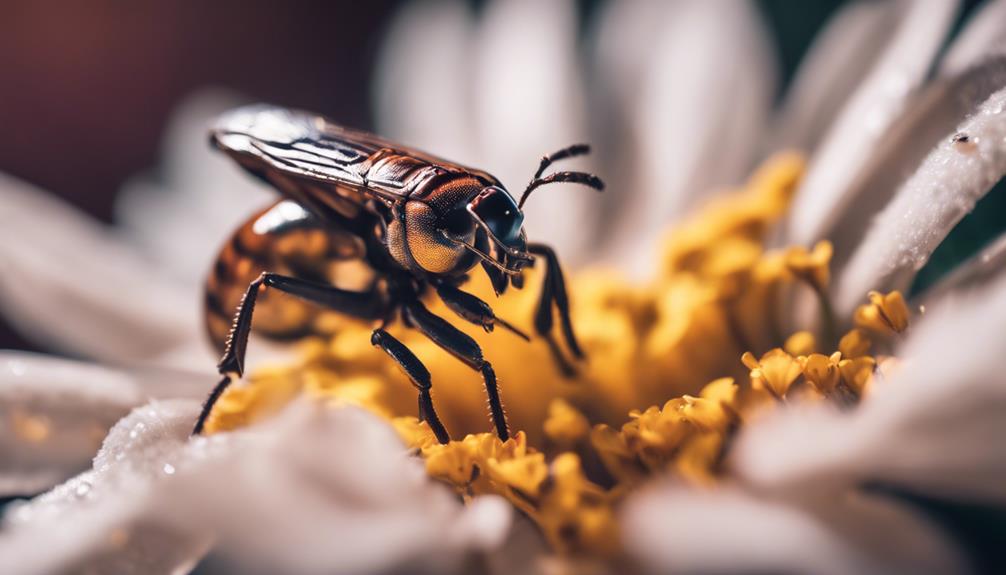
When you're just starting out, subject selection is important. You might wonder what makes a good macro subject. Basically, anything with intricate details that usually go unnoticed is perfect. Think about the delicate veins of a leaf, the eyes of an insect, or the intricate patterns of a snowflake. These subjects not only challenge your skills but also enhance your appreciation of the world's complexity and beauty.
To excel in macro photography, you'll need to look at ordinary objects with a new perspective. Start in your own backyard; you'll be surprised at the myriad of potential subjects hidden in plain sight. This approach not only sharpens your skills but also fuels your creativity, turning simple objects into extraordinary images. Remember, the best macro photography evokes curiosity and awe, transforming the familiar into the extraordinary.
Essential Equipment List
To immerse yourself in the world of macro photography, you'll need a few key pieces of equipment that are essential for capturing those stunning, close-up details. First, the macro lens is your gateway to magnifying those tiny wonders. You'll want to make sure your lens is compatible with your camera body—whether it's a DSLR or mirrorless—to fully utilize its capabilities.
A sturdy tripod is non-negotiable; it stabilizes your camera, guaranteeing sharp, clear images. Different tripod types cater to various shooting environments. A flexible tripod is great for uneven surfaces, while a traditional tripod might be better for studio settings.
Lighting is also important. A dedicated macro ring light provides even, direct light without harsh shadows, bringing out the intricate details of your subject.
Here's a quick guide to help you start:
| Equipment Type | Description |
|---|---|
| Macro Lens | Choose one that's compatible with your camera body and offers 1:1 magnification for true macro shots. |
| Tripod | Consider the environment; flexible tripods are great for outdoor, uneven terrains, while heavier, stable tripods suit indoor or studio work. |
| Lighting | A macro ring light or softbox can enhance detail and minimize shadows, essential for highlighting textures. |
Camera Settings Explained
Delving into your camera settings is essential for capturing the exquisite detail and clarity in macro photography. Let's explore some critical settings that can make or break your images.
First, consider the shutter speed. In macro photography, even the slightest movement can blur your subject. To freeze motion, you'll often need a faster shutter speed. However, balance is key, as a very fast shutter speed can reduce light, affecting the exposure of your image.
Next, pay attention to ISO sensitivity. It's tempting to crank up the ISO to compensate for low light, but higher ISO settings can introduce noise, which degrades image quality. Ideally, you'll want to keep the ISO as low as possible. Use a tripod to stabilize your camera, allowing you to use a lower ISO and slower shutter speeds without the risk of motion blur.
Lighting Techniques for Macro
After delving into your camera settings, focus on refining your lighting techniques to illuminate the intricate details in macro photography. Good lighting not only reveals the rich textures and vibrant colors of your subject but also sets the mood of your photograph. Let's immerse ourselves in how you can harness and modify light effectively.
Natural light manipulation is your most powerful tool in macro photography. You'll find that the soft, diffused light of an overcast day enhances colors and minimizes harsh shadows. Positioning your subject to maximize the use of available light can dramatically improve your images. Reflectors are handy for bouncing light back onto the subject, filling in unwanted shadows.
DIY diffusers are easy to make and incredibly effective for softening light when shooting outdoors. Materials like white fabric or frosted shower curtains can be used to diffuse harsh sunlight.
Here's a quick reference table on using these tools:
| Technique | Tool | Effect |
|---|---|---|
| Light Bouncing | Reflectors | Fills shadows, enhances illumination |
| Harsh Light Softening | DIY Diffusers | Creates even, soft light |
| Direct Sunlight Management | Natural Light Positioning | Optimizes natural lighting conditions |
Embrace these techniques and watch as your macro photography blossoms with newfound clarity and vibrancy.
Composing Your Macro Shots

Crafting the perfect composition in macro photography elevates your subject's impact, drawing the viewer's eye into the heart of the scene. As you explore this tiny world, consider how each component within your frame contributes to the overall aesthetic. Start with background selection. A cluttered or distracting background can detract from your main subject. Look for simple, uniform backgrounds that enhance your subject rather than compete with it. Soft, muted colors or a dark, unobtrusive backdrop can make your subject pop and give your photo a clean, professional look.
Be mindful of subject movement, especially when dealing with living creatures like insects or flowers swaying in a breeze. This movement can introduce a dynamic element to your photos, adding a sense of life and immediacy. Position yourself so the movement complements the composition, leading the viewer's eye through the image. For instance, if a bug is crawling up a branch, compose the shot so the branch diagonally crosses the frame, guiding the eye upwards following the bug's path.
Tips for Sharp Focus
Achieving sharp focus is essential in macro photography to capture the intricate details of your subject. In the world of close-up shots, even the tiniest shift can blur your image, so mastering focus techniques is vital. Here's how you can elevate your macro shots with pinpoint clarity.
Firstly, consider the concept of depth management. Due to the shallow depth of field in macro photography, the area in sharp focus is extremely limited. You'll need to select your aperture wisely; smaller apertures (higher f-numbers) increase the depth of field, bringing more of your subject into focus. Experiment with different settings to find the perfect balance between light and sharpness.
Another powerful technique is focus stacking. This method involves taking multiple shots of your subject at different focus distances and then combining them in post-processing to create a single image with greater depth of field than could be achieved in a single exposure. It's especially useful for subjects with complex textures or layers.
Post-Processing Macro Images
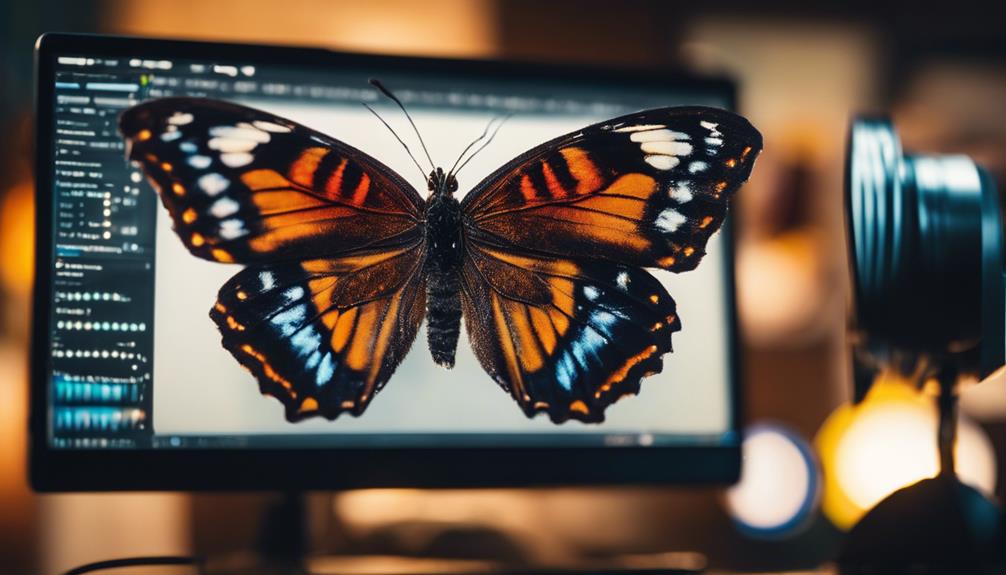
Once you've captured your macro images, skillful post-processing can greatly enhance their detail and impact. The right techniques can transform a good macro shot into a breathtaking one. Let's explore how you can achieve the best results.
Firstly, color adjustments are important. In macro photography, colors should pop and accurately reflect the vibrant, hidden world of your subject. Adjusting the saturation, vibrance, and hue can help in bringing out the best in your images. Be mindful not to overdo it; subtlety is key to maintaining natural-looking results.
Noise reduction is another essential step. Macro photography often requires higher ISO settings which can introduce noise. Using noise reduction tools can help you achieve a cleaner image, which is essential for showcasing fine details without graininess.
Here's a quick reference table for post-processing steps:
| Step | Tool/Feature | Purpose |
|---|---|---|
| 1. Color Balance | Saturation, Vibrance | Enhance or correct color tones |
| 2. Noise Reduction | Noise Reduction Slider | Minimize grain and enhance detail |
| 3. Sharpening | Sharpening Tools | Increase clarity and detail |
| 4. Cropping | Crop Tool | Focus viewer's attention on the subject |
| 5. Exporting | File Format Options | Optimize for intended use (web/print) |
Frequently Asked Questions
Can Macro Photography Be Done With a Smartphone?
Yes, you can definitely engage in macro photography with your smartphone. You'll need to invest in some smartphone accessories, like a macro lens attachment, to get those detailed close-up shots.
Lighting challenges are common in macro photography, so consider using a portable light to illuminate your subject. With the right tools and techniques, you can capture the intricate details of the tiny world around you, turning everyday items into fascinating subjects.
Is a Tripod Necessary for Macro Photography?
You don't always need a tripod for macro photography, but stability is essential to capture sharp, detailed images.
You can explore tripod alternatives like bean bags or mini tripods that are more flexible and portable.
Additionally, hone your hand-held stability techniques, such as bracing your camera against a solid object or using your body as a stabilizer.
These methods can inspire you to shoot stunning macro photos even without traditional equipment.
How Do Weather Conditions Affect Macro Photography?
Weather conditions can greatly impact your macro photography adventures. Moisture affects lens clarity and the subject's appearance, potentially adding magical dewdrops or foggy hazes.
Meanwhile, lighting challenges arise on overcast days or during golden hours, requiring adjustments in your exposure settings. Embrace these elements as opportunities to capture unique, breathtaking images that highlight nature's intricate details and textures.
What Are Common Mistakes in Macro Photography?
Common mistakes in macro photography include improper lighting and inadequate focus. You'll find that poor lighting can flatten your subject, losing essential details and colors.
Meanwhile, not focusing precisely can leave your main interest blurry, detracting from the impact of your shot. To excel, practice manipulating light sources and refine your focusing techniques.
Embrace these challenges, and you'll capture the intricate beauty of close-up worlds with breathtaking clarity and vibrance.
Can Macro Lenses Be Used for Non-Macro Photography?
Absolutely, you can use macro lenses for non-macro photography! These lenses aren't just one-trick ponies; their lens versatility shines through in various scenarios.
Especially in portrait photography, the sharp focus and ability to capture fine details highlight the subject's features beautifully, offering portrait potential that's hard to match.
Conclusion
Now that you're equipped with the essentials of macro photography, don't let the fear of complexity hold you back. Immerse yourself in the tiny wonders around you with confidence.
Adjust your settings, master your lighting, and refine your compositions. With practice, your focus will sharpen, and your post-processing skills will enhance each shot.
Remember, every small detail offers a unique story. Embrace this art to reveal and capture the unseen beauty of the miniature world. Keep exploring, keep capturing!

