To capture the succulence of every dish, your journey starts with selecting the right camera and a versatile lens—perhaps a macro for those close-up, textural details. Bathing your plate in natural light, you can craft shadows and highlights that tease out the colors and contours, turning each component into a character in your visual story. Consider the allure of soft morning light or the dramatic appeal of artificial setups that sculpt your food with precision. As you compose, let the Rule of Thirds guide your creativity, ensuring every sprig and spice plays its part. This is just the beginning of a delicious exploration into the art of making your culinary creations leap from the plate. Further wonders await as you master these techniques.
Choosing Your Equipment
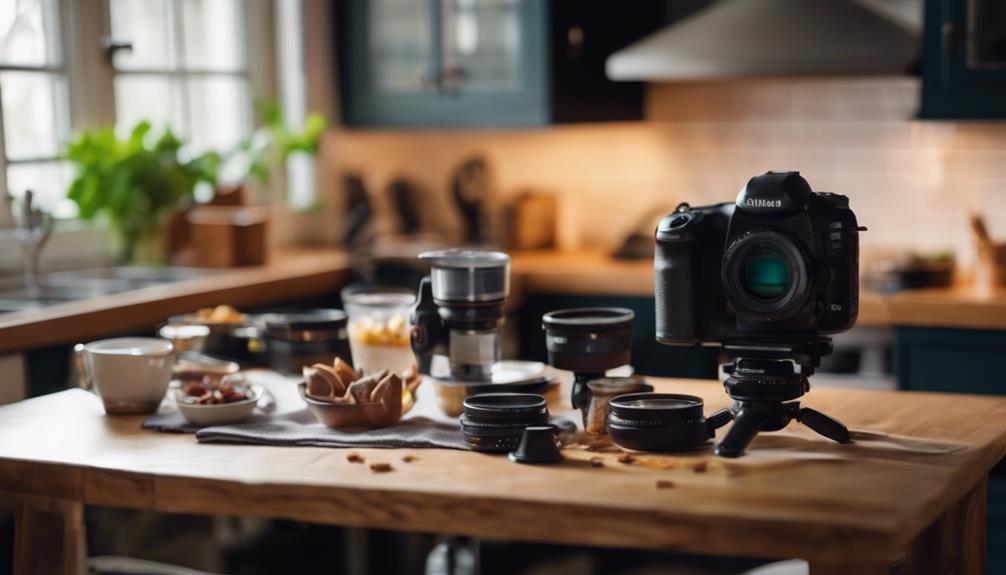
Delving into the world of food photography, your choice of equipment can significantly elevate your visual storytelling. As you commence on this flavor-filled journey, the camera you wield becomes your brush, and the lenses your palette of colors. Selecting the right tools isn't just a matter of importance; it's vital for capturing the very soul of your culinary creations.
When it comes to camera maintenance, it's essential to keep your equipment in pristine condition. Dust, dirt, and fingerprints can obscure the subtle textures and vibrant colors of your dishes. Regularly cleaning your camera sensor and lens guarantees that every shot you take is as crisp and clear as the flavors on your plate.
Lens selection, however, is where you can truly play with perspectives. A macro lens, for instance, allows you to capture intricate details, making sugar grains glisten like morning dew, and the oil on a slice of pizza shimmer seductively. A wide aperture lens, on the other hand, can blur backgrounds beautifully, making your dish stand out as the undeniable star of the show. Each lens offers a unique way to narrate your food's story, so choose wisely and let your creativity flow.
Understanding Natural Light
Mastering the art of using natural light in food photography can transform your images from ordinary to extraordinary. You'll find a new depth in your photos when you harness the beauty of sunlight streaming through a window. The dance of light and shadow creates layers of texture and intrigue, making your dishes not just seen, but felt.
Set up your shoot near a large window where soft, diffused light bathes your culinary creations. This gentle illumination wraps around the curves and peaks of your food, highlighting its freshness and vibrancy. Be mindful of the time of day, as the changing angle of the sun affects the mood and tone of your images. Morning light tends to be cooler, casting a crisp, clear glow, while afternoon light brings a warmer, golden hue that can make your dishes look even more inviting.
Engage with the dynamic nature of window reflections and shadow play. These elements add a subtle narrative to your photographs. Reflections can mirror the complexity or simplicity of a dish, while shadows can sculpt the space, drawing attention to the textures and colors. Experiment with these interactions, and you'll see your food in a new light—literally.
Exploring Artificial Lighting
Venture into the world of artificial lighting to uncover the dramatic potential it brings to your food photography. Unlike the soft, diffuse glow of natural daylight, artificial light sources offer you complete control over the shadows, highlights, and the overall mood of your compositions. You can sculpt the light, capturing the glisten of a fresh tomato or the steam rising from a hot bowl of soup with precision that can make viewers' mouths water.
Here are a few essentials to elevate your food shots using artificial lighting:
- Choose the Right Light Source: Options like LED panels or softboxes can mimic natural light, giving your food a lifelike appeal.
- Utilize Light Modifiers: Soften or focus your light using umbrellas, diffusers, or reflectors to enhance textures and details.
- Experiment with Color Temperatures: Warm lights can enrich golden tones of baked goods, while cooler lights may highlight the freshness of seafood and vegetables.
- Control Shadows with Flags: Use flags to block light selectively, adding depth and dimension to your plates.
Each element allows you to play with nuances, crafting images that not only show food but tell a story, evoking tastes and aromas through the lens.
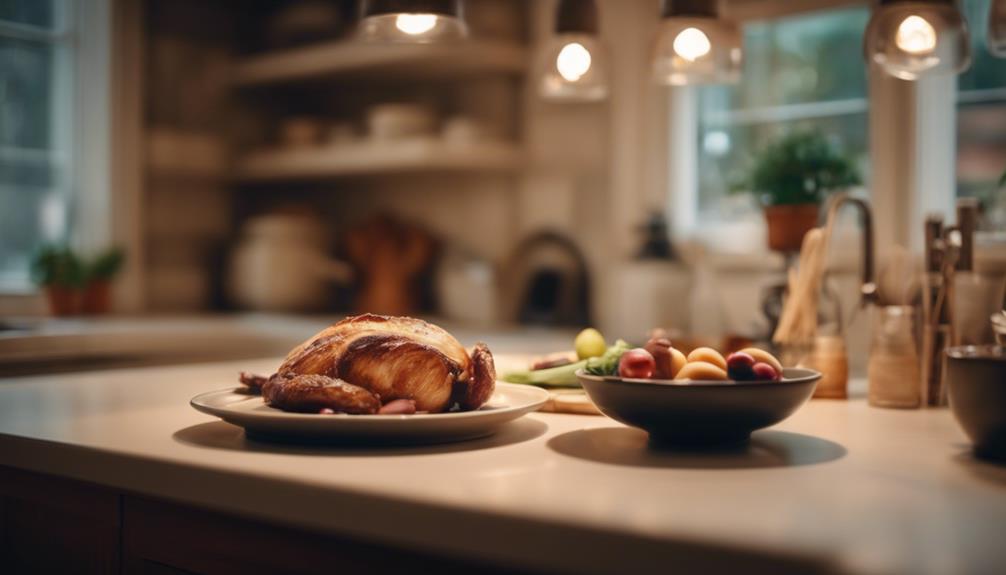
Setting Up Your Scene
Now that you've harnessed the power of artificial lighting, let's focus on arranging your culinary subjects to create a compelling visual narrative. The scene you set around your dish is not merely a backdrop—it's a canvas where every element adds depth and emotion to your food story. Background selection and prop arrangement are pivotal in transforming a simple photo into a piece of art.
Choosing the right background means finding a color and texture that complements, not competes with, your dish. Think soft, muted tones that whisper elegance or bold, dark shades that shout luxury. It's all about creating a mood that whispers tales of taste and texture. Here's a simple guide to help you get started:
| Background Type | Ideal Use |
|---|---|
| Textured Linen | Rustic charm |
| Solid Black | Modern contrast |
| Marble Slab | Sophisticated flair |
| Wooden Boards | Warm, homey feel |
| Bright Colors | Vibrant, playful dishes |
Now, let's talk prop arrangement. This is your chance to be a storyteller. Arrange utensils, ingredients, and textiles to guide the eye and enhance the narrative of your culinary creation. Each prop should feel like an intentional, integral part of the scene, harmoniously blending into the tableau you're crafting. Remember, it's not just about the food—it's about the feast for the eyes.
Composing Your Shot

Once you've delved into arranging your scene with meticulous care, it's crucial to compose your shot, ensuring every angle and element tells a part of your story. The canvas of your camera's viewfinder is where the magic happens, where you transform an ordinary meal into a tantalizing visual feast. Embrace the artistry of composition, and let's explore the fundamentals that will elevate your food photographs from good to absolutely stunning.
Here are some key techniques to master:
- Rule of Thirds: Visualize dividing your frame into a grid of nine equal segments by using two horizontal and two vertical lines. Place key elements—your focal points—where these lines intersect. It creates a more engaging, balanced photo.
- Focal Points: Showcase the star of your dish. Determine what the viewer's eye should be drawn to first. This could be a glistening cherry atop a sundae or a perfectly seared steak. Make it stand out.
- Angles: Experiment with various perspectives to find the most compelling view. A top-down angle is perfect for dishes served flat, capturing the full layout, while a side view might best showcase the layers of a burger.
- Background and Edges: Review the edges of your frame and the background. They should complement, not detract from your focal points. A cluttered background can overshadow your subject, so simplify if needed.
Through these techniques, your photos won't just display food, but will narrate its delectable story.
Styling Your Food
Mastering the art of food styling transforms your dish into a visual masterpiece, enticing viewers with its aesthetic allure. You start by envisioning the plate as your canvas and the ingredients as your vibrant colors. Careful ingredient placement guarantees each element is showcased, creating a harmonious balance on the plate. Think of how a painter selects hues to bring their artwork to life; similarly, you'll use color contrasts to make your dishes pop. A splash of red tomatoes against a creamy risotto base, or the bright green of basil on a golden pizza, each choice is deliberate, designed to draw the eye and evoke emotions.
Here's a quick guide on combining elements effectively:
| Element | Purpose | Example |
|---|---|---|
| Texture | Adds depth and interest | Crispy bacon on smooth soup |
| Color | Creates visual appeal | Garnish of fresh herbs |
| Height | Gives dimension and perspective | Stacked ingredients, layered cakes |
| Garnish | Provides a finishing touch | A sprig of mint, edible flowers |
As you arrange your dish, remember that each angle offers a new perspective. Rotate your plate, experiment with different backdrops, and don't be afraid to rearrange until everything looks just right. This is your art; let your passion guide each placement.
Mastering Post-Processing

After capturing your culinary creations, refining them through post-processing can elevate your photographs from good to breathtaking. This phase is where your artistic flair truly comes into play, allowing you to infuse each image with emotion and appeal that speaks to the viewer's senses.
Here's how you can enhance your photos artistically:
- Color Correction: Start by adjusting the white balance to guarantee the colors in your photograph reflect the true beauty of your dish. Enhancing the vibrancy can make the ingredients pop, making the greens of herbs and the reds of fresh tomatoes burst with life.
- Image Cropping: Don't be afraid to crop your images for a more compelling composition. Sometimes, less is more. Focus on the dish and eliminate distractions that don't serve the story of your food.
- Contrast and Brightness: Adjust these settings to add depth to your food. A well-balanced contrast can highlight textures and layers, making your dish look more inviting.
- Sharpening Details: Lastly, apply a subtle sharpen to bring out the finer details of your food. This step will help in capturing the essence of freshness and the crispness of your culinary delights.
Through these steps, you'll transform your snapshots into sumptuous visuals that tantalize the taste buds before the first bite is ever taken.
Practicing Consistently
To truly excel in food photography, you'll need to commit to practicing consistently, honing your skills with every shot you take. Imagine each frame as a canvas, where your ingredients tell a vibrant story, your lighting sets the mood, and your composition draws the viewer into a moment of culinary bliss. This journey isn't just about snapping pictures; it's about crafting an experience that resonates with emotion and beauty.
Engage regularly in creative challenges to push the boundaries of your craft. These exercises force you out of your comfort zone and infuse your work with fresh perspectives and innovative techniques. Participate in portfolio reviews which provide invaluable feedback, helping you refine your vision and technique. Listen, learn, and adapt.
Here's a table that captures the essence of consistent practice:
| Week | Activity | Emotion Evoked |
|---|---|---|
| 1 | Try a new lens | Curiosity |
| 2 | Adjust lighting | Wonder |
| 3 | Recreate a dish | Determination |
| 4 | Review portfolio | Reflection |
Let each step be a brushstroke that adds depth and texture to your portfolio. With each photo, you're not just capturing food; you're weaving a tapestry of flavors, colors, and emotions that beckon the world to look closer.
Frequently Asked Questions
What Are Common Legal Considerations in Food Photography?
In food photography, you must navigate several legal considerations to protect your work and respect others' rights.
Always secure copyright permissions for recipes or images that aren't yours.
If you're capturing people, especially in settings like restaurants or markets, obtaining model releases is essential to avoid legal pitfalls.
These steps guarantee that your artistic creations remain both stunning and compliant, allowing you to share your passion widely without fearing infringement issues.
How to Handle Food Allergies in Food Styling?
When styling food, you've to take into account allergies seriously. Use ingredient alternatives to navigate common allergens—think nut-free pestos or gluten-free flours. It's more than just swapping ingredients; it's about crafting a feast for the eyes that's safe for everyone.
Don't forget the allergy labeling; it's your silent communicator, ensuring viewers know exactly what they're admiring. Your artistic touch not only makes the dish irresistible but also reassuringly safe.
Can Food Photography Become a Full-Time Career?
Absolutely, food photography can evolve into a full-time career! With over 32% of visual content creators focusing solely on food, the market demand is ripe for talented photographers.
You'll need to immerse yourself in portfolio building, capturing the essence and artistry of each dish in exquisite detail. Every shot you take tells a story, resonates with viewers, and enhances your craft.
Embrace the challenge, the field is vibrant and awaits your unique vision!
What Are Best Practices for Food Photography on Mobile?
To immerse yourself in your mobile food photography, focus intensely on lighting tips and composition techniques. Harness natural light whenever possible, creating soft shadows that reveal texture and form.
Experiment with angles, arranging your dishes artistically to tell a story through each shot. Your phone's grid feature can guide you in applying the rule of thirds, transforming ordinary meals into stunning, gallery-worthy images.
Engage with the colors, embrace the details, and capture the flavors visually!
How to Collaborate With Chefs for a Food Shoot?
To collaborate with chefs for a food shoot, you'll want to master the art of chef communication. Engage with them passionately, valuing their creative input as much as your vision.
Discuss the story behind each dish; this allows you to capture the essence and emotion plated in every meal. Remember, it's a dance of mutual respect and creativity, where each shot becomes a shared masterpiece that immortalizes their culinary art.
Conclusion
Now, cradle your camera like a painter's brush and immerse yourself in the vivid dance of shadows and light.
Let each dish be a canvas, your ingredients a palette of vibrant hues.
Frame every shot with a lover's eye, cherishing the steam that whispers secrets from a simmering pot.
With every click, you capture a story, a fleeting moment of edible art.
Keep practicing, keep tasting the world through your lens, and let every photo be a feast for the eyes.
Embrace this journey, for your masterpiece awaits.

