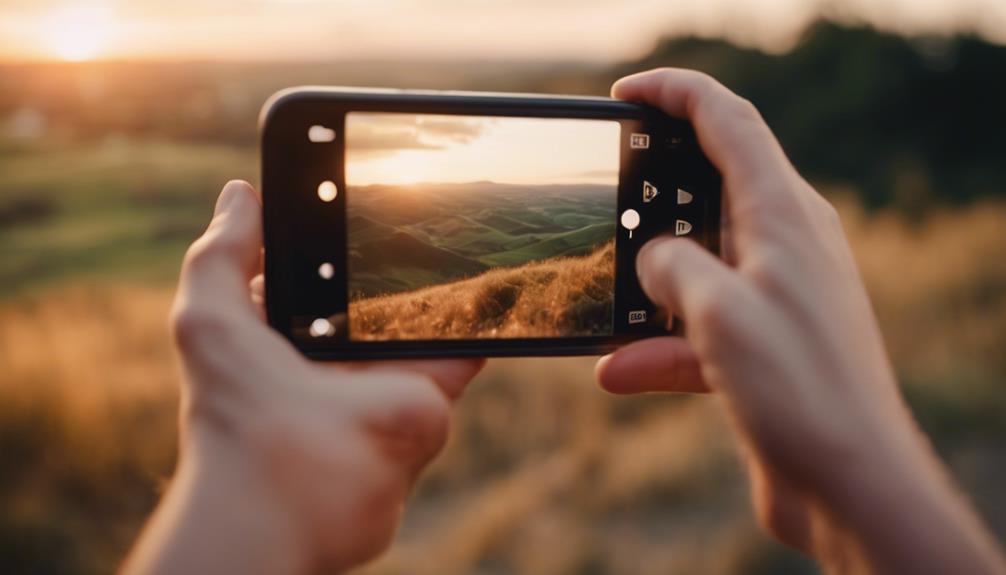
You can take pro-level photos with just your smartphone by mastering a few key techniques. Harness the power of natural lighting; early morning and late afternoon light provide soft, diffused illumination that enhances your images. Utilize the rule of thirds for dynamic compositions, and don't forget to experiment with different perspectives and angles to add uniqueness to your shots. Your phone's manual mode allows you to control settings like ISO and shutter speed, increasing your creative potential. Additionally, apps like Snapseed and Adobe Lightroom Mobile can elevate your editing game. These tips will transform your smartphone photos, and there's always more tricks to uncover.
Mastering Natural Lighting
Harnessing natural light can significantly enhance your smartphone photos, offering vividness and depth that artificial lighting struggles to match. One key element to mastering this is understanding the play of shadows. Shadows aren't just a lack of light; they're a tool to add mood, texture, and perspective to your images. When you're outdoors, observe how shadows fall differently at various times of the day. Early morning or late afternoon, when the shadows are long and soft, can add a layer of intrigue and dimension to your composition.
Another vital time to capture natural light at its best is during the 'golden hour'—the period shortly after sunrise or before sunset. This time is valued for its soft, diffused light that can bathe your subject in a warm glow, enhancing skin tones and the scenery with a rich, golden color. It's ideal for portraits and landscape photos alike. You'll find that during golden hour, your smartphone's camera will capture colors that are much more vibrant than under the harsh midday sun. Experiment with angles to see how the golden light can best complement your subject.
This practice not only improves your photos but deepens your understanding of light's impact.
Composition and Framing Techniques
While mastering natural light plays a pivotal role, effectively using composition and framing techniques can transform your smartphone photography from good to great. You don't need expensive gear to capture stunning images; smart framing and composition are key. Here's how you can elevate your photos:
- Rule of Thirds: Divide your frame into a grid of nine equal parts using two horizontal and two vertical lines. Place your subject along these lines or at their intersections. This technique creates more tension, energy, and interest in the composition than simply centering the subject.
- Leading Lines: Use natural lines like roads, pathways, or rivers to lead the eye into the picture. These lines should draw attention towards the main subject of your photo, enhancing the overall impact and giving the viewer a journey through the frame.
- Framing: Look for natural frames within your environment, such as windows, arches, or overhanging branches. These can help isolate the main subject from the rest of the scene and focus the viewer's attention.
- Symmetry and Patterns: Capturing symmetry can be visually pleasing. Look for patterns or repetitive elements in your surroundings. These can create visually appealing backgrounds that enhance your subject.
Utilizing Smartphone Features

After mastering composition and framing techniques, it's time to explore how your smartphone's built-in features can further enhance your photography skills. Diving into manual mode exploration offers you control over aspects like ISO, shutter speed, and aperture. By tweaking these settings, you're able to manage how much light enters the lens, capture sharp images in low light, or create a blurred background for a professional depth of field effect.
Don't overlook the potential of camera attachment options either. Your smartphone alone is powerful, but pairing it with attachments like macro or wide-angle lenses transforms it into a versatile tool that rivals traditional cameras. These attachments snap on easily and can greatly expand the range of photos you're able to capture – from sweeping landscapes to intricate close-ups.
Experiment with different settings in your phone's manual mode. Start by adjusting the shutter speed in various lighting conditions. Notice how slower speeds blur motion, while faster speeds freeze it. Play with the ISO settings to see how they affect the graininess of your photo, especially in darker environments. By actively using these features, you'll not only improve your photographic technique but also enhance the overall quality of your images.
Editing Apps for Enhancement
Once you've captured your photos, editing apps can greatly refine and elevate your images with professional flair. Modern smartphones can take stunning pictures, but it's the post-processing that can transform a good photo into a great one. Here's how you can enhance your smartphone photos using editing apps:
- Snapseed: This versatile app offers a range of tools and filters to improve color grading and sharpness. The 'Selective Adjust' tool lets you pinpoint specific areas in your photo for enhancement, making it easy to draw attention to your main subject.
- VSCO: Known for its stylish presets, VSCO is a favorite for aesthetic filter applications. It also includes advanced editing tools for fine-tuning exposure, contrast, and saturation, helping you achieve a cohesive look across your photos.
- Adobe Lightroom Mobile: A powerhouse for serious photographers, this app provides extensive control over color grading, allowing you to adjust the color balance and tone with precision. Its built-in camera feature also enables shooting in RAW for higher quality edits.
- Afterlight 2: Ideal for creative edits, Afterlight 2 offers a range of basic and advanced tools, including filters, textures, and frames. Its color shift tool is particularly useful for dramatic color adjustments and mood setting.
These apps can greatly enhance your photography, giving you the tools to express your creativity and improve your photographic skills.
Capturing Motion Effectively
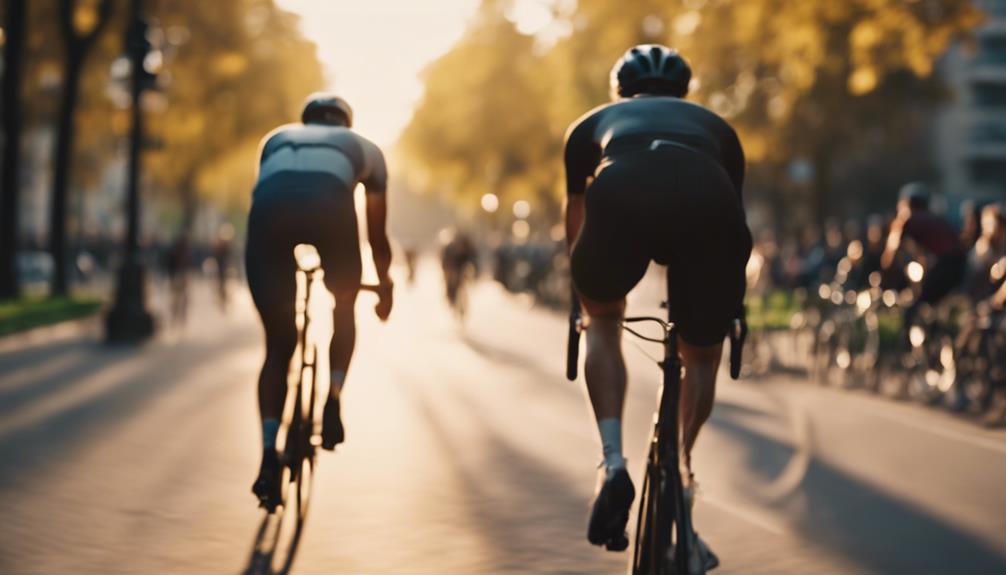
Now that you've mastered enhancing your photos with editing apps, let's focus on how you can effectively capture motion to add dynamic interest to your images. One powerful tool at your disposal is shutter speed control. On your smartphone, you can usually adjust this in the manual or pro mode. Decreasing the shutter speed lets more light in, which is perfect for low-light conditions but also allows you to creatively blur motion. For instance, capturing a flowing waterfall with a slow shutter speed creates a smooth, ethereal effect.
Conversely, a fast shutter speed can freeze the action, ideal for snapping quick movements without blur, like a bird in mid-flight. Experiment with different speeds to see how it changes the feel of your images.
Another technique to master is the panning technique. This involves moving your camera at the same speed as your moving subject, which can be anything from a running dog to a speeding car. The background will blur, giving the impression of speed, while your subject stays sharp. It takes practice, but once you get it right, the results are breathtaking. Fine-tune these techniques to bring a sense of life and movement into your photography.
Overcoming Common Challenges
While experimenting with smartphone photography, you'll likely encounter several common challenges, such as poor lighting and unwanted blur, which require specific strategies to overcome effectively. Overcoming these hurdles can elevate your photos from good to great. Here's how you can tackle some of the frequent issues:
- Maintain Lens Cleanliness: Always start by wiping your smartphone's lens. A clean lens guarantees clearer, sharper images. Use a microfiber cloth to gently remove fingerprints and smudges without scratching the lens.
- Enhance Focus Stability: To combat blur, especially in low light, stabilize your phone. Use a tripod or rest your phone against a stable surface. Activate your camera's focus-lock feature by tapping and holding your subject on the screen; this secures the focus even if you slightly move.
- Control Lighting with Apps: Poor lighting can ruin a good shot. Use camera apps that allow you to adjust exposure and ISO settings manually. This control can greatly improve the quality of your photos under various lighting conditions.
- Experiment with HDR Mode: High Dynamic Range (HDR) mode can be a game-changer in contrasting light situations. It helps balance the light and dark parts of your photo, ensuring detailed and vibrant outcomes.
Frequently Asked Questions
Can Smartphones Handle Professional-Grade Photo Printing?
Yes, you can use your smartphone to handle professional-grade photo printing, but you'll need to take a few things into account. Pay attention to resolution limits; make sure your photos are taken at the highest resolution possible to avoid pixelation.
Also, check the color accuracy of your images, as smartphones can sometimes distort hues. By optimizing these settings, you'll get closer to achieving those crisp, vibrant prints you're aiming for, even without high-end equipment.
Are External Smartphone Lenses Worth the Investment?
Absolutely, external smartphone lenses are worth considering. A staggering 85% of mobile photographers see improved photo quality with these add-ons.
They enhance lens compatibility and minimize image distortion, essential for crisp, clear images. Whether capturing sprawling landscapes or intricate close-ups, these lenses greatly enhance your phone's capabilities.
They're a smart investment if you're serious about photography but aren't ready to splurge on a professional camera just yet.
How Does Weather Affect Smartphone Photography?
Weather greatly impacts your smartphone photography. Lighting challenges arise, especially during overcast or stormy conditions, affecting the clarity and mood of your photos.
Bright sunlight can cause harsh shadows or overexposure. Moisture risks are also a concern; rain or fog can damage your device if it's not waterproof and can cause lens fogging, which blurs your images.
Always protect your phone and adjust settings to mitigate these effects for better shots.
What Are the Best Conditions for Night Photography With Smartphones?
For night photography with your smartphone, you'll want clear skies and minimal light pollution. It's ideal to shoot during new moon phases when the sky is darkest.
Use low light apps designed to enhance your phone's capabilities under limited light conditions. These apps help manage exposure and reduce noise, allowing you to capture stunning night skies or cityscapes with greater clarity and detail, transforming ordinary shots into extraordinary captures of the night.
How to Prevent Smartphone Overheating During Long Photo Sessions?
To prevent your smartphone from overheating during long photo sessions, focus on effective battery management. Lower your screen brightness and close unnecessary apps to reduce power consumption.
Additionally, consider investing in cooling accessories like a portable fan or a phone cooling case. These tools help dissipate heat away from your device, ensuring it stays cool and functions at its best, even during extended use.
This approach not only protects your phone but also enhances performance.
Conclusion
With these smartphone photography hacks, your journey through the art of capturing life has just begun. Think of your phone as a brush, and the world as your canvas.
Master the light, frame your masterpiece, and paint with features and apps. Each snapshot you take is a step further in refining your skill, transforming everyday moments into extraordinary memories.
Embrace challenges as opportunities to grow, and watch as your gallery becomes a vivid proof of your evolving vision.

