Mastering natural light photography allows you to capture beautiful photos effortlessly, utilizing the sun's daily offerings. Start by leveraging the golden hours at dawn and dusk when the light casts warm, flattering hues. Experiment with side lighting to accentuate textures and create depth or use backlighting for dramatic silhouettes. Remember, the color temperature can influence the mood of your shots—warm golden tones evoke warmth and happiness, while cool blues evoke calmness. Enhance light quality with reflectors and diffusers to soften harsh sunlight, ensuring your subjects look their best. Each tool and technique opens up new possibilities, guiding you to see the light like never before.
Understanding Natural Light Sources
To truly harness the power of your photography, you need to understand how natural light sources can significantly shape your images. Grasping the concept of light directionality and color temperature isn't just essential—it's transformative. Let's delve into these elements to elevate your photo skills.
Light directionality refers to the path and angle at which light hits your subject. It's important because it affects the texture, depth, and shadow intensity in your photos. For instance, side lighting can enhance textures and create a sense of depth, while backlighting might silhouette your subject against a brighter background, adding mood and drama.
Color temperature, on the other hand, is about the warmth or coolness of the light. Measured in Kelvin, this aspect of light can vary from the warm golden hues of early morning to the cool blue shades of a cloudy day. Understanding this will allow you to use natural light to evoke different emotions and atmospheres in your photography.
Best Times for Natural Light
Capturing the magic of natural light hinges on knowing the best times to shoot, which often align with the golden hours of dawn and dusk. During these times, the sun is positioned low in the sky, creating a soft, diffused light that enhances textures and colors in your photographs. You'll find the warm, golden tones not only add a dreamlike quality but also diminish harsh shadows and reduce the risk of overexposure that can occur during the brighter hours of the day.
Light angles during these periods are particularly flattering, lending themselves to a variety of subjects, from sweeping landscapes to detailed portraits. Understanding how these angles work helps you manipulate the scene to your advantage, using the natural contours of light to highlight your subject.
Seasonal variations also play a critical role in your photography. As the Earth tilts, the quality and angle of sunlight change, offering a spectrum of opportunities depending on the time of year. Winter light, with its low arc, offers prolonged periods of softer light, while summer can provide vivid sunrise and sunset colors that are spectacular for bold, dramatic shots. By aligning your sessions with these natural rhythms, you'll craft images that aren't only beautiful but also resonate with the essence of the moment.
Tools to Enhance Natural Lighting
Several tools can greatly enhance your natural light photography, each designed to optimize and control the lighting conditions you encounter. Among these, reflective surfaces and light diffusers stand out as essentials for any photographer looking to harness the beauty of natural light.
Reflective surfaces, such as reflectors, are invaluable for directing light where you need it most. Whether you're filling in shadows on a sunny day or intensifying light on an overcast afternoon, reflectors help you manipulate light to suit your vision without introducing artificial elements. They come in various sizes and finishes—silver for a stronger reflection, white for a softer effect, and gold to cast a warm glow, enhancing skin tones beautifully.
Light diffusers, on the other hand, work by softening the harshness of direct sunlight. By placing a diffuser between the sun and your subject, you can achieve a gentle, even light that flatters your subject and reduces contrast. This tool is particularly useful during midday shoots when the sun is at its peak, ensuring your photographs retain a soft, natural quality without the extremes of light and shadow.
With these tools, you'll find that mastering natural light isn't just about finding the right time of day; it's also about creatively shaping the light to work in your favor.
Techniques for Softening Harsh Light
When dealing with the midday sun, you can soften harsh light by using specific techniques that enhance your photography's natural appeal. The key is to manipulate light to work in your favor, ensuring your subject is bathed in a flattering glow rather than harsh shadows.
One effective method is using light modifiers. Reflectors are particularly useful as they bounce light away from direct harsh sources, softly filling in shadows on your subject's face or your focal object. You'll find reflectors in various surfaces like silver, gold, or white, each adding a unique touch to the light quality.
Another essential tool in your arsenal should be diffusion materials. These materials, such as diffuser panels or translucent fabrics, spread the light evenly, reducing its intensity and softening the overall look of your photos. You can easily hold a diffuser between the sun and your subject or mount it on a frame to keep your hands free. This technique is especially valuable during those peak sunlight hours when shadows are their sharpest.
Using Shadows Creatively
Harnessing shadows in your photography can transform them from mere absence of light to compelling elements that enhance the mood and depth of your images. When you start playing with shadows, you're diving into a world where light and darkness dance together, creating scenes that can be intensely emotional or strikingly dramatic. Shadow play isn't just about capturing the darkness; it's about using that darkness to draw attention to the light, to shape it, and to create a visual story that your viewers can't resist.
By mastering contrast control, you can accentuate the textures and details that might otherwise go unnoticed. Think of shadows as your canvas and the light as your paint; together, they allow you to highlight the aspects of your subject that are most compelling.
Here's a simple guide to get you started with using shadows creatively:
| Tip | How It Helps |
|---|---|
| Use shadows to lead | Directs the viewer's eye |
| through the composition. | |
| Play with angles | Changes the shadow's shape and intensity. |
| Observe the time | Shadows lengthen or shorten, affecting mood. |
| Experiment with forms | Creates mystery or drama in your scene. |
The Role of Weather in Lighting
Weather greatly influences the quality and character of natural light in photography, impacting how you capture each scene. Different weather conditions create unique lighting environments that can transform an ordinary scene into a breathtaking photograph. Let's explore how cloud patterns and rain reflections can enhance your natural light photography.
Cloud patterns aren't just backdrops; they're dynamic light modifiers in the sky. They scatter sunlight, creating a range of effects from soft, diffused light on overcast days to dramatic, high-contrast scenes when the sun peeks through broken clouds. You'll find that cloudy days often provide the most forgiving conditions, reducing harsh shadows and subtle textures in your subjects.
Rain adds another layer of depth to your photographs through reflections. After a rainstorm, puddles and wet surfaces offer you mirrors that reflect the world in unique, often surreal ways. Capturing these reflections requires you to look at the world from different perspectives, finding symmetry or juxtaposition in the reflected imagery. Rain also saturates colors, making them pop against the often-gray backdrop of a stormy sky.
Composition Tips for Natural Light
Mastering composition in natural light photography can significantly enhance the impact of your images. By grasping and exploring basic compositional techniques like the Rule of Thirds and Leading Lines, you'll capture not just photos, but stories. Let's dive into these powerful tools.
The Rule of Thirds is a fundamental principle where you divide your frame into nine equal segments by two vertical and two horizontal lines. Place your subject along these lines or at their intersections to create more tension, energy, and interest in your composition. This technique isn't just a rule but a guide to discover a more dynamic frame, especially when combined with the soft, diffused light of a cloudy day or the harsh shadows of a sunny afternoon.
Leading Lines guide your viewer's eyes through the photograph, creating a journey from one element to another. These can be anything — a winding road, a stretching shadow, or architectural edges. In natural light, shadows and highlights can become leading lines themselves, emphasizing textures and contours.
Capturing the Golden Hour
During the golden hour, the soft, warm light can transform your natural light photographs into stunning works of art. This magical time occurs just after sunrise and before sunset, offering a brief window where everything seems to glow. The light's angle enhances color dynamics, deepening the hues and softening the landscape into an almost dreamlike state.
To make the most of this time, you'll need to master exposure adjustments. The contrast between light and shadows isn't as harsh as midday, but it's still significant. Start by slightly underexposing to maintain detail in bright areas, then adjust shadows in post-processing to reveal more texture and depth.
Here's a quick guide to help you capture the golden hour effectively:
| Time to Shoot | Camera Settings | Tips |
|---|---|---|
| 30 min after sunrise | Lower ISO, wider aperture | Capture the soft glow |
| 1 hour before sunset | Adjust exposure compensation | Enhance warm tones |
| Throughout golden hour | Use a tripod | Stabilize for clarity |
| 15 min before sunset | Increase ISO as light fades | Maintain sharpness |
| During fluctuating light | Bracket exposures | Blend images for balance |
Managing Indoor Natural Light
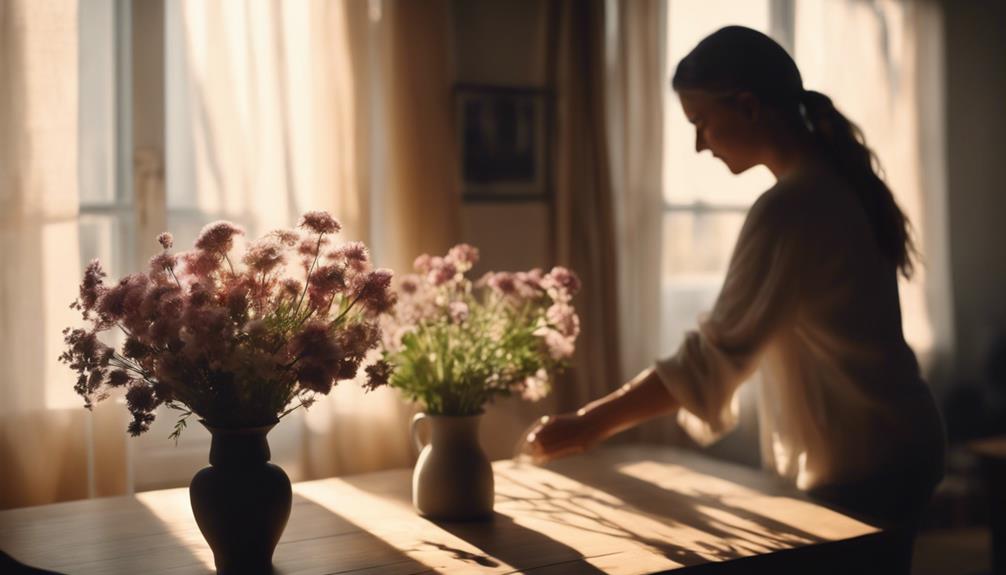
How can you harness the subtle nuances of indoor natural light to enhance your photography? The key lies in understanding the behavior of light within a space and using it to your advantage. Start with window treatments, which aren't just decorative but functional tools that control the amount and quality of light entering your room. Sheer curtains can soften harsh sunlight, creating a diffused, gentle glow perfect for achieving a dreamy look in your images. On the other hand, using blackout curtains to eliminate unwanted light can help you manipulate the scene more precisely, focusing the natural light where it's most flattering.
Pay attention to light reflectivity within your indoor settings. Light-colored walls and floors can act as natural reflectors, bouncing light into shadows and illuminating your subject beautifully. Conversely, dark colors absorb light, which can be used to create moodier, more dramatic compositions. Experiment with different surfaces and materials to see how they change the light's impact on your scene.
You'll find that managing indoor natural light isn't just about dealing with the light that's there, but creatively modifying it to suit your vision. With practice, you'll turn any indoor environment into a striking photo opportunity, capturing images that resonate with natural beauty and emotion.
Post-Processing Natural Light Photos
Once you've captured your images, refining them in post-processing can elevate the natural light effects to truly stunning levels. You might think that what you see in your camera is what you get, but the digital darkroom offers a plethora of tools to enhance and transform your natural light photography into something even more magical.
Here are four key steps to master in post-processing:
- Adjust the Basic Settings: Start by tweaking the exposure, contrast, and white balance to reflect the true environment of your shot. This foundational step guarantees your photo looks natural and balanced.
- Color Grading: This is where you can truly start to personalize your image. Color grading allows you to enhance or change the mood of your photos by adjusting the colors to be warmer or cooler, depending on the feeling you want to convey.
- Exposure Blending: For images with high dynamic range, like those shot at sunrise or sunset, exposure blending lets you combine multiple exposures of the same scene to achieve perfect illumination throughout the image.
- Refine Details and Texture: Enhance the sharpness and textures to make details pop—especially important in highlighting the subtle interplay of light and shadow.
Frequently Asked Questions
What Are Common Mistakes Beginners Make With Natural Light Photography?
When you're starting out, common mistakes in natural light photography often include poor light positioning and inadequate shadow management.
You might place your subject in harsh sunlight, causing unflattering shadows and overexposed spots, or in too dim an area, leading to grainy, underexposed images.
Learning to harness the sun's position and understanding shadows can greatly enhance your photos, turning everyday scenes into compelling, beautifully lit images that convey depth and emotion.
How Does Natural Light Photography Impact Battery Life?
Natural light photography tends to drain your camera's battery faster, especially if you're constantly adjusting lighting adjustments and exposure settings to suit changing conditions.
You'll find yourself frequently tweaking these to capture the perfect shot, which can be battery-intensive. To guarantee this, always carry spare batteries or a portable charger.
This will guarantee you never miss a moment due to a dead battery, keeping your creative process fluid and uninterrupted.
Can Natural Light Photography Cause Sensor Damage?
You don't need to worry about natural light photography causing sensor damage if you manage your camera settings wisely. Continuously exposing your sensor to extremely bright conditions, like direct sunlight through a lens, can affect sensor longevity.
Always monitor your exposure settings to protect your equipment. With careful handling, your camera's sensor can last as long as you need it to, letting you capture countless stunning images.
Be inspired and shoot fearlessly!
What Are the Insurance Considerations for Outdoor Natural Light Shoots?
When planning outdoor natural light shoots, you must consider insurance to protect against weather risks and guarantee equipment coverage.
It's essential to have a policy that covers damage from sudden weather changes, which can occur unexpectedly.
Additionally, securing thorough equipment insurance guards against loss or damage.
This proactive approach not only safeguards your investment but also grants you peace of mind, allowing you to focus on capturing those perfect, fleeting moments.
How Do Different Camera Brands Perform Under Varying Natural Light Conditions?
You're not in Kansas anymore when you explore how different camera brands handle natural light!
Brand sensitivity and exposure flexibility are key. Some brands excel in low light, offering less noise and greater detail, while others might provide more exposure flexibility, adapting smoothly to changing conditions.
Explore and experiment with various brands to find the one that best captures the magic of natural light, turning your photos from good to breathtaking.
Conclusion
As you watch the sun dip below the horizon, painting the sky in hues of gold and pink, remember that each photo you take under natural light is a canvas of fleeting moments. Mastering natural light isn't just about capturing images; it's about embracing the dance of shadows and brilliance around you.
Keep exploring and adjusting; your persistence will transform ordinary scenes into extraordinary memories, turning every snapshot into a masterpiece illuminated by the most artistic light of all—the sun.

